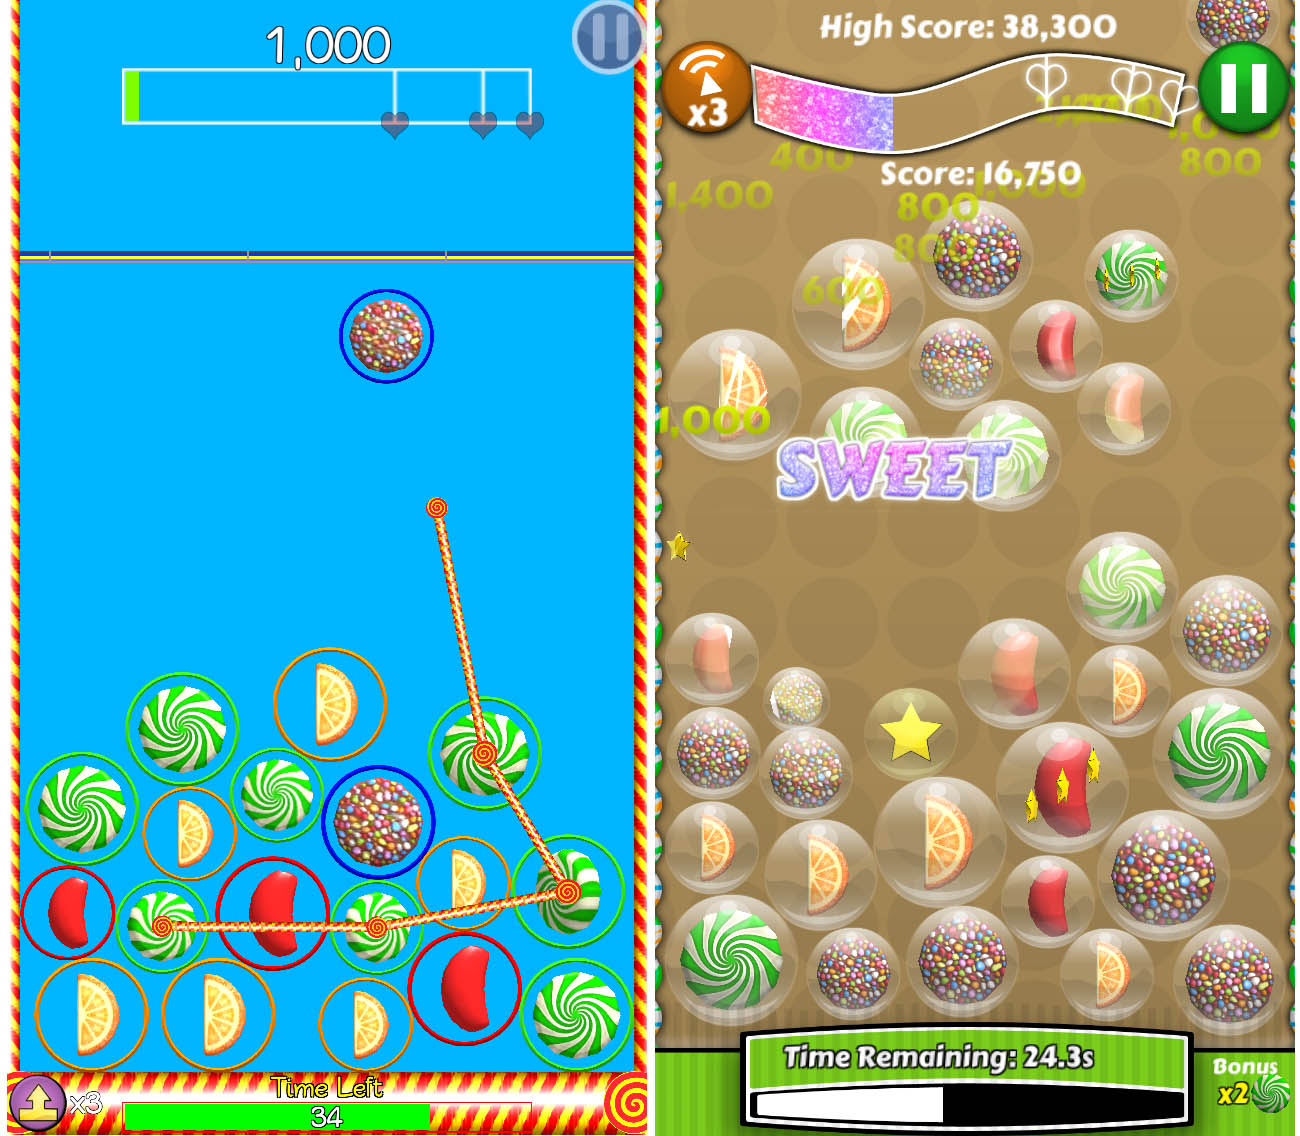
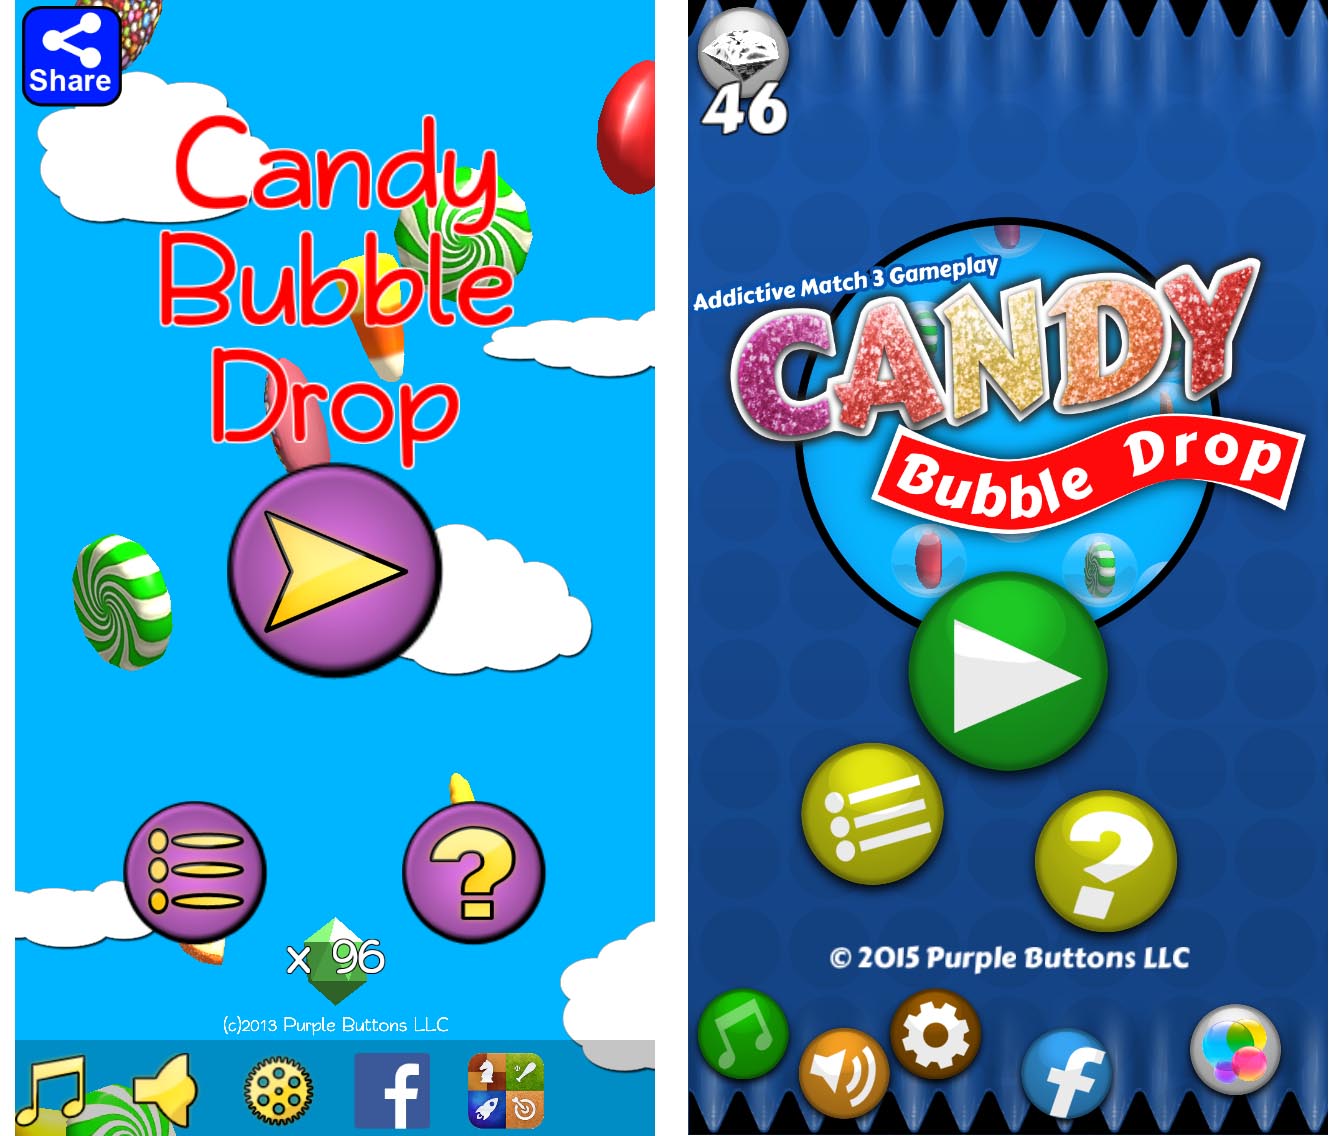
As you can see from the ‘before & after’ image below, the in-game visual style got quite a lift from the old ‘programmer’ art. I really like the textured background. This is done with a tiled sprite repeated horizontally. The color tint is adjusted based on the current zone.
Preserve Code Plugin Test
Just installed a plugin that declares that it will preserve code formatting… let’s see how well it works with some shader programming…
		Pass

		{

			CGPROGRAM

				#pragma vertex vert

				#pragma fragment frag

				#include "UnityCG.cginc"
struct appdata_t
{
float4 vertex : POSITION;
float2 texcoord : TEXCOORD0;
float2 texcoord2 : TEXCOORD1;
fixed4 color : COLOR;
};
struct v2f
{
float4 vertex : POSITION;
float2 texcoord : TEXCOORD0;
float2 texcoord2 : TEXCOORD1;
fixed4 color : COLOR;
};
sampler2D _MainTex;
sampler2D _DetailTex;
float4 _MainTex_ST;
float4 _DetailTex_ST;
float4 _DetailTex_TexelSize;
fixed4 _Color;
fixed _Strength;
v2f vert (appdata_t v)
{
v2f o;
o.vertex = mul(UNITY_MATRIX_MVP, v.vertex);
o.texcoord = TRANSFORM_TEX(v.texcoord, _MainTex);
o.texcoord2 = TRANSFORM_TEX(v.texcoord2 * _DetailTex_TexelSize.xy, _DetailTex);
o.color = v.color;
return o;
}
half4 frag (v2f i) : COLOR
{
half4 col = i.color;
fixed4 detail = tex2D(_DetailTex, i.texcoord2);
col.rgb = lerp(col.rgb, col.rgb * detail.rgb, detail.a * _Strength);
col.a *= tex2D(_MainTex, i.texcoord).a;
col = col * _Color;
clip (col.a - 0.01);
return col;
}
ENDCG
}
Seems to work pretty well, but I ended up editing the HTML & pasting the code in that view. I’ll see how it goes over the next few weeks.
64 bit iOS required
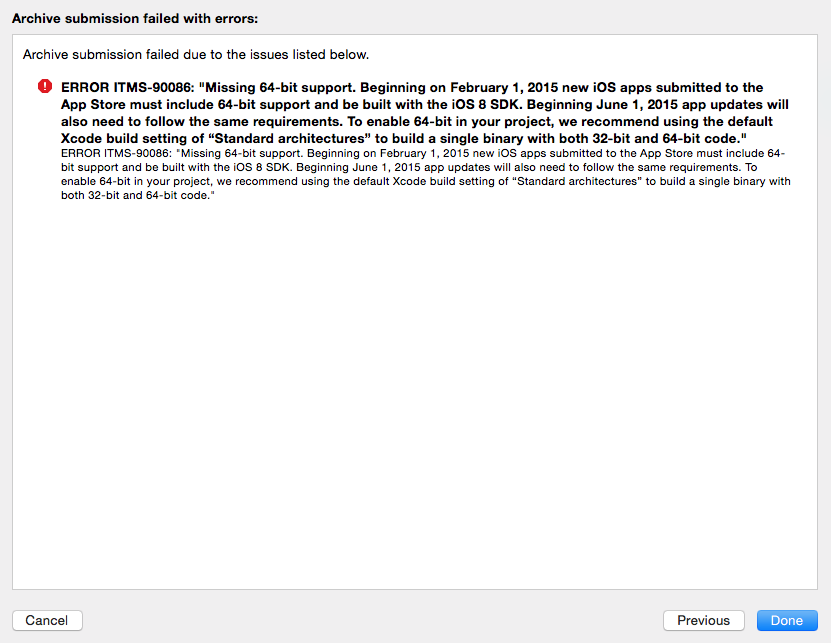
As of today, all apps submitted to the App store, including updates need to support 64bit. Got a bit of a shock when I tried submitting my build of Candy Bubble Drop and saw this error screen!
Luckily, the folks at Unity were prepared (more than I was) and I was able to enable 64 bit support from within the Player Settings and everything worked beautifully!
Sliced Sprites
As part of my Candy Bubble Drop makeover, I was told that my ‘Rainbow’ shader didnt cut it, and so I was given a pre-rendered set of sprites with the bonus text lines nicely done up.
While this was really nicely done, I would need to slice it into horizontal pieces with each word saved to a separate PSD file. Being lazy, and thinking this wouldn’t be the only time I’d want to do this, I set about creating a custom NGUI Sprite that allowed me to specify a slice height, and then a slice index, so I could chose which horizontal slice I’d display at run-time.
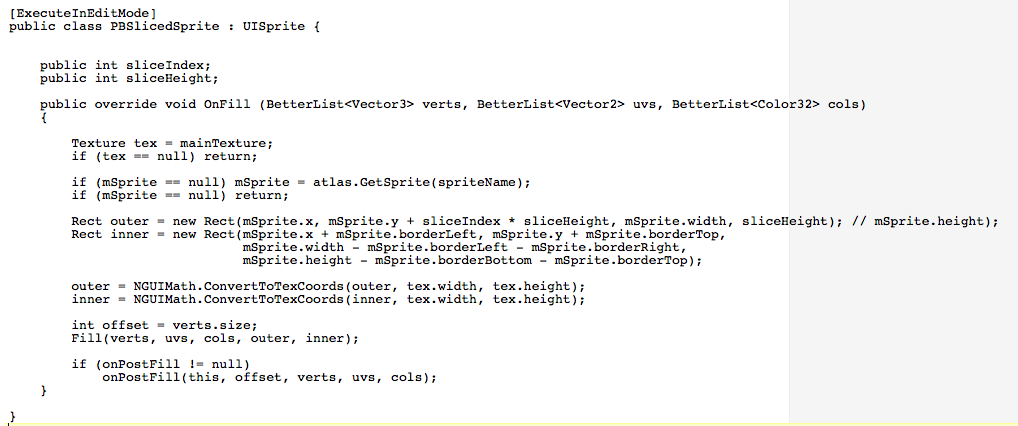
Creating the custom NGUI sprite class was pretty straight forward. I added a new script to my Unity project called PBSlicedSprite.cs and added the following lines:
I basically just overrode the normal OnFill method, and used the sliceHeight as the sprite’s height, and the sliceIndex * sliceHeight to offset the starting position. Note, that as this is an internal class (i.e. used by me) there is no error checking on the index, so negative or large values will have curious results.
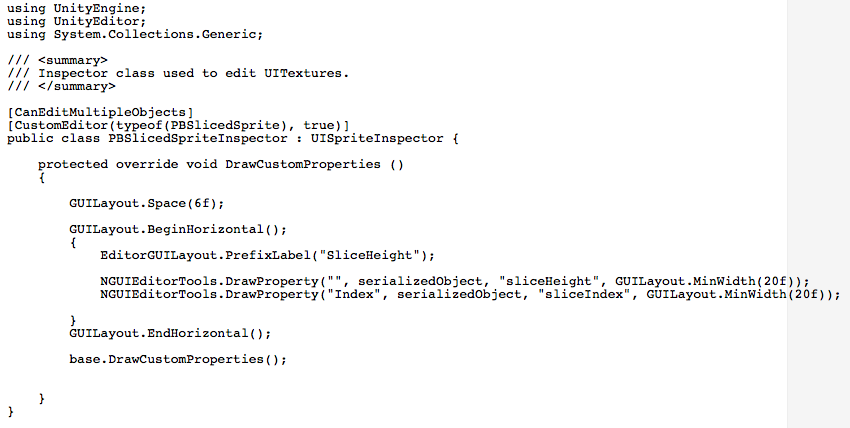
With the class created, I needed to create a custom inspector for the class as NGUI will not display public vars in one of its fancy inspectors by default. After a little research looking at other NGUI inspectors, I came up with the following:
That inserts a line before the standard NGUI sprite panel in the inspector, allowing me to enter the slice height and the index in the editor, and adjust them in code.
I’m happy with the end result, and I’m pretty sure I’ll find a use for this class in future projects.
Let me know if you have any questions or comments.
